Ever opened your Pomodoro history and felt lost, like you’re staring at a jumbled list of numbers?
We’ve all been there – you finish a focused sprint, glance at the session log, and wonder which block was the client call, which was the research dive, and which was just a coffee break. That confusion makes it hard to spot patterns, celebrate wins, or tweak your workflow.
That’s why learning how to tag and label sessions for review can be a game‑changer. A simple tag like “[Essay Draft]” or “[Team Sync]” instantly tells you what that 25‑minute burst was really about, without having to dig through notes later.
Imagine you’re a student cramming for finals. You pop a Pomodoro, label it “[Biology Flashcards]”, and later, when the exam week rolls around, you can filter all those biology sessions and see exactly how much time you actually invested. No more second‑guessing whether you studied enough.
Or think about a freelancer juggling three projects. One block gets the tag “[Client A – Invoice]”, another “[Client B – Design Mockup]”. At week’s end, a quick glance at the tagged summary shows you which client earned the most focus minutes, helping you bill accurately and plan next week’s priorities.
Remote workers love this too. A quick “[Stand‑up]” label on the morning check‑in session lets you track how much time you spend on coordination versus deep work, so you can protect your flow time.
So, how do you actually start tagging? First, decide on a handful of consistent tags that match your most common tasks. Keep them short, use brackets or emojis if that helps you scan faster. Second, apply the tag the moment you start the timer – the habit sticks better than retro‑fitting it later.
Finally, set a weekly review ritual: open your Focus Keeper dashboard, filter by tag, and note any surprises. Maybe “[Email]” sessions are eating more minutes than you thought, or “[Learning]” blocks are growing steadily. Those insights guide you to adjust your schedule, eliminate waste, and double‑down on what fuels progress.
Ready to bring order to your Pomodoro history? Let’s dive deeper and walk through a step‑by‑step tagging workflow that turns chaotic logs into clear, actionable data.
TL;DR
Want to turn chaotic Pomodoro logs into clear insight? Learning how to tag and label sessions for review lets you instantly see where your focus minutes go.
Apply a handful of consistent tags, filter in your dashboard weekly, and you’ll spot time‑wasters, boost productivity, and bill clients with confidence today.
Step 1: Define a Consistent Tagging Taxonomy
Ever glance at your Pomodoro list and feel like you’re reading a secret code? You’re not alone. The first thing that helps is turning that chaos into a simple, repeatable naming system. Think of it like a colour‑coded wardrobe: you know exactly which shirt matches which pants without a second‑guess.
Start by asking yourself: what are the core buckets of work you do every week? For most of our users – students, remote workers, freelancers, busy pros – the answer lands in a handful of categories: deep work, communication, learning, and admin. Write those down, keep them short, and give each a visual cue if you like (emoji, brackets, or a single‑letter code). Example: [DW] for deep work, 📞 for calls.
Build a hierarchy, not a maze
It’s tempting to create a tag for every tiny task, but that quickly defeats the purpose. Instead, use a two‑level approach: a broad parent tag plus an optional sub‑tag. [DW – Writing] tells you the session was focused writing, while [DW] alone is enough when you just need the big picture. This hierarchy mirrors how we organise files on a computer – simple enough to remember, powerful enough to filter.
And here’s a practical tip: draft your taxonomy on a sticky note or a quick Google Doc, then copy‑paste the list into the tag field the moment you start a timer. The habit sticks because you’re not typing a new label each time; you’re just picking from a pre‑approved menu.
Does this feel overwhelming? Not really. Grab a pen, list the top three activities you do most, add a parent tag for each, and you’ve got a functional taxonomy in under five minutes. If you’re a freelancer juggling multiple clients, you might add a client identifier as the parent ([ClientA], [ClientB]) and then tack on the work type ([ClientA – Design]).
Once you’ve settled on your tags, test them for a week. At the end of each day, glance at the dashboard. Are you able to locate a specific session in two clicks? If not, simplify – maybe collapse [Learning – Spanish] into just [Learning] and rely on notes for the detail.
One of the biggest wins comes during the weekly review. Open your Focus Keeper dashboard, filter by the parent tag you care about, and watch the minutes add up. Suddenly you see that [Communication] is eating 30 % of your week, while [Deep Work] only claims 45 %. That insight is the catalyst for intentional scheduling.
Need a deeper dive into how to structure those tags? Check out our session tagging strategies guide for examples, templates, and a printable cheat‑sheet.
Now, let’s bring a little extra brain‑fuel into the mix. If you struggle to stay sharp while you’re categorising and reviewing, a focus‑enhancing supplement can be a handy sidekick. Great Bite’s nootropic gummies, for instance, are designed to support mental clarity during those deep‑work sprints.
While the video walks you through the mechanics of setting up tags, remember that the real power is in consistency. Treat your taxonomy like a daily ritual: pick the tag, start the timer, and close the loop with a quick note if needed.
Here’s a quick checklist to sanity‑check your taxonomy before you lock it in:
- Are all tags ≤ 15 characters?
- Do they use a consistent format (brackets, emojis, dashes)?
- Can you filter by a parent tag and instantly see meaningful totals?
- Did you test the system for at least five days?
When the checklist looks green, you’re ready to scale. Your next step will be wiring those tags into a weekly review template, so the numbers become actionable insights you can act on.
 ” and “[Client Call]” written on them, a coffee mug, soft natural lighting. Alt: Tagging Pomodoro sessions for review in a realistic workspace.]
Step 2: Choose the Right Labeling Toolset
Okay, you’ve got a solid taxonomy – now it’s time to pick the tool that actually lets you slap those tags onto each Pomodoro block without pulling your hair out.
In our experience, the best tool does three things: it makes tagging effortless, it surfaces the tags when you need them, and it feeds the data back into a dashboard you can actually read.
What to Look for in a Labeling Toolset
First, ask yourself: do I want the tags to live inside the timer, or am I happy linking out to a separate note‑taking app? If you prefer everything in one place, a built‑in solution wins. If you already use Notion or Trello for project tracking, look for a seamless integration.
Next, think about visual cues. Color‑coded emojis or badge icons let you spot a “[Study 📚]” session in a glance. A tool that lets you customize those visuals saves you the mental overhead of remembering what each plain word means.Finally, check the export options. Being able to dump a CSV of tagged sessions means you can run deeper analysis later – maybe in Excel, Google Sheets, or even a BI tool.
So, what does that look like in practice?
Popular Toolsets Compared
Below is a quick rundown of three setups that many of our users swear by. Pick the one that feels least frictiony for your workflow.
| Feature | Toolset | Notes |
|---|---|---|
| Native tagging inside timer | Focus Keeper built‑in label field | Quickest way – tags appear right on the timer screen; supports emojis and brackets. |
| Two‑way sync with docs | Notion API integration | Creates a page for each session; you can embed the tag in the page title and still see Pomodoro stats. |
| Kanban visualisation | Trello Power‑Up (Custom Fields) | Great for freelancers juggling multiple clients; tags become cards on a board for instant overview. |
Notice how each option still respects the three core principles we just talked about: ease, visual clarity, and exportability.
Does any of that sound like a good fit for you? If you’re a student who already lives in Notion, the API route might feel natural. If you’re a remote worker who loves a clean dashboard, the native Focus Keeper field probably wins.
Quick Setup Checklist
Whatever you pick, run through this short checklist before you start your next Pomodoro:
- Enable the label field (or install the Power‑Up).
- Pick a visual style – brackets, emojis, or colour‑coded prefixes.
- Test a single session: start the timer, add the tag, hit “Start”.
- Open the review view and confirm the tag appears where you expect.
- Export a sample CSV and glance at the columns – do they line up with your analysis needs?
If any step feels clunky, pause and tweak the configuration. The goal is a frictionless habit, not a technical obstacle.
Here’s a short video that walks through setting up tags in Focus Keeper’s label field. It shows the exact clicks you need, so you can copy‑paste the process without guessing.
After you’ve got the tool humming, you’ll notice a subtle shift: labeling stops feeling like a chore and becomes part of the ritual. Suddenly, you’re not just working; you’re building a data‑rich narrative of how you spend every focused minute.
And that narrative? It’s the fuel for the next step – reviewing trends, spotting time‑sinks, and making smarter decisions about where to double‑down.
Ready to give your labeling setup a spin? Grab your favorite toolset, follow the checklist, and you’ll be turning raw Pomodoro minutes into clear, actionable insight before you know it.
Step 3: Implement Automated Tag Assignment
Now that your taxonomy lives in the label field and your timer is humming, it’s time to let the system do the heavy lifting. Instead of typing a tag every single Pomodoro, you can set up a rule that slaps the right label on automatically.
Why bother with automation? Imagine you’re a freelancer juggling three clients. You start a “Design Mockup” sprint, then a “Client A – Invoice” call, then a quick “Email” check‑in. If you have to stop and type each tag, you lose momentum. An automated workflow keeps the focus train rolling.
Pick a trigger that matches your workflow
Most Pomodoro apps, including Focus Keeper, let you attach a custom script or use built‑in “default tag” settings. The trigger can be as simple as “when the timer starts, apply the last used tag” or as smart as “if the task name contains ‘research’, add [Research 🔍].”
Think about the moment you know what you’re about to do. For a student, the cue is often the course name on the study plan. For a remote worker, it might be the calendar event title. Align the trigger with that cue, and the tag appears without you lifting a finger.
Step‑by‑step: Configure automated tagging in Focus Keeper
- Open the Settings panel and locate the “Label Automation” tab.
- Choose a rule type – we recommend “Keyword Match” for most users.
- Enter the keywords that map to your core tags. For example, type
client a→[Client A – Design],stand‑up→[Stand‑up 🤝]. - Set the action to “Apply tag automatically when timer starts.”
- Save the rule and give it a quick test run.
That’s it. From now on, whenever you start a session titled “Client A – Wireframe,” Focus Keeper will automatically tag it [Client A – Design] for you.
Does this feel a bit “set it and forget it”? Absolutely. But you’ll still want to peek under the hood now and then.
Test, verify, and fine‑tune
Run a short three‑session sprint: one for each of your most common activities. After the timer ends, head to the review view and confirm the tags line up with the titles you entered. If anything looks off, go back to Settings and tweak the keyword list.
Automation isn’t magic; it’s a loop. The more you refine the trigger‑keyword pairs, the sharper the system gets. A quick weekly check – “Did any session get the wrong tag?” – keeps the data clean.
Pro tip: keep a “catch‑all” tag like [Misc] for anything that doesn’t match a rule. That way nothing falls through the cracks, and you can later re‑assign those stray sessions during your review ritual.
Integrate with your weekly review
When Friday rolls around, export the CSV or pull the dashboard view. Because the tags were applied automatically, you’ll see a tidy column of labels ready for analysis. Spot patterns, bill clients accurately, or see if “Break ☕” is sneaking into your focus minutes.
Automation turns the tagging habit from a manual after‑thought into a seamless part of the Pomodoro ritual. You get the same granular insight without the mental overhead.
Ready to give it a whirl? Open Focus Keeper’s settings, map a few keywords, and let the app do the tagging for you. In a couple of days you’ll wonder how you ever lived without it.
Step 4: Apply Manual Labels for Edge Cases
We’ve gotten the basics down – taxonomy, toolset, automation. But there will always be those oddball sessions that slip through the rule‑based net.
Think about that 10‑minute “quick research” you do between client calls, or the half‑hour “coffee chat” that feels more like networking. Those moments don’t match your standard keywords, so the timer either leaves them unlabeled or tags them incorrectly.
Spot the gaps before they become habits
Start by scanning last week’s export (or the in‑app history) for any rows with a blank or generic [Misc] label. If you see three or four of them, that’s a clue.
Write them down in a quick “edge‑case” notebook. For each, note the exact task description you used when you started the Pomodoro.
Craft a manual label that tells a story
Instead of forcing everything into an existing tag, give the outlier a label that captures its nuance. For example, a short brainstorming session with a teammate could become [Brainstorm – Feature X]. A quick admin sprint for “invoice cleanup” might be [Admin – Invoice]. The key is to keep it concise but descriptive enough that you’ll recognise it weeks later.
When you create the label, think about the questions you’ll ask during review: “How much time am I spending on ad‑hoc brainstorming?” or “Are admin bursts eating into billable minutes?” Your manual tag should answer those questions at a glance.
Apply the label in the moment
Here’s a simple three‑step routine you can embed into your Pomodoro start ritual:
- Read the task name you just typed.
- If it matches an existing automated rule, hit “Start” as usual.
- If it feels like an outlier, tap the label field, type your custom tag, and then start the timer.
Most Pomodoro apps, including Focus Keeper, let you hit a shortcut (like Cmd + L) to jump straight to the label field, so you don’t lose momentum.
Validate and refine weekly
Every Friday, pull the session list and filter for any tags you created manually. Ask yourself:
- Did the label give me the insight I expected?
- Is the label too specific or too vague?
- Can I turn this manual tag into an automated rule for next week?
If you notice a pattern – say you keep creating [Brainstorm – *] tags – consider adding a keyword rule for “brainstorm” that automatically applies [Brainstorm] and then use the secondary note field for the project detail.
Conversely, if a tag only appears once a month, keep it manual. There’s no need to clutter your rule list with one‑off cases.
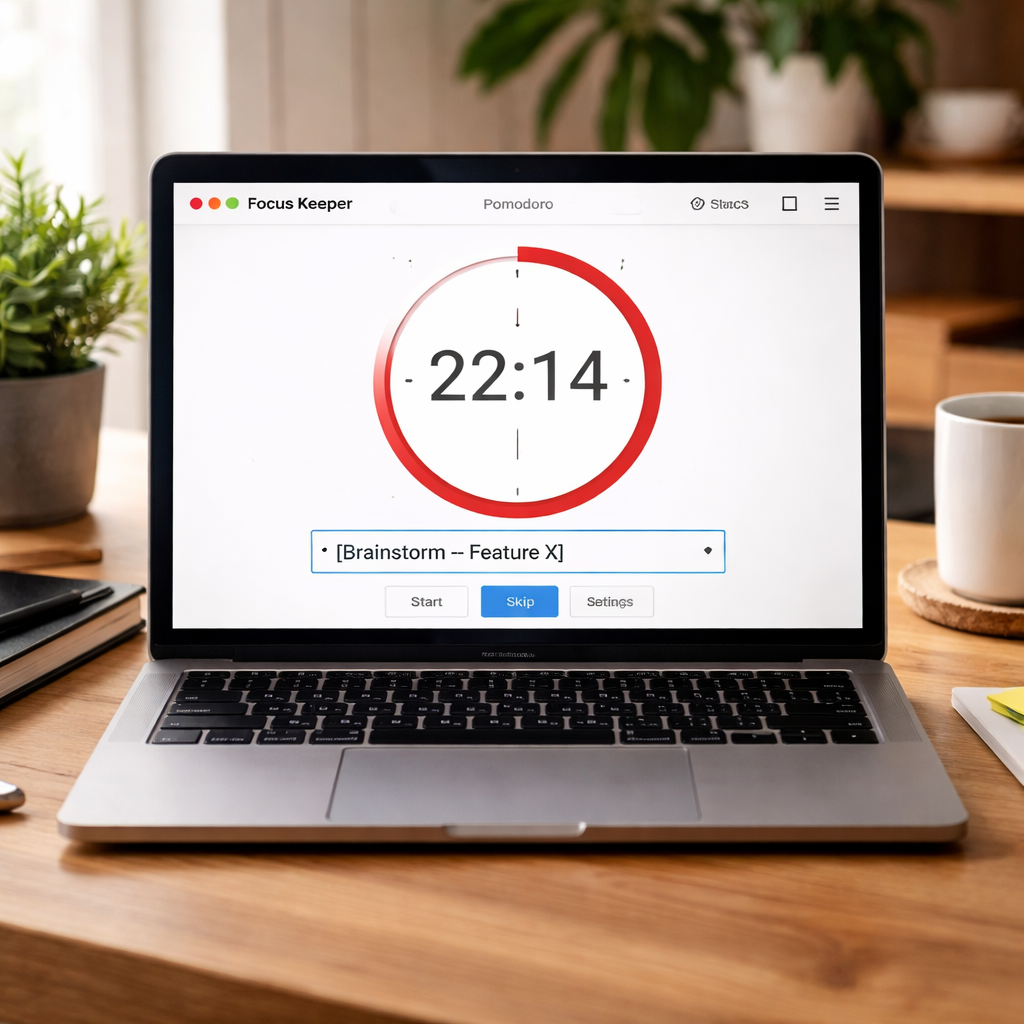 ”, a coffee mug, and a notepad with a list of edge‑case tags beside it; natural lighting on a tidy home office desk. Alt: Realistic image of applying manual labels to Pomodoro sessions for review.]
Tips from the field
• Use a consistent prefix for manual tags, like “[Misc‑]” or “[Ad‑hoc]”. That way you can filter them quickly in your review dashboard.
• Keep a “review‑only” tag such as [Review] for sessions you know you’ll need to revisit later – for instance, a quick skim of a research paper that you plan to dive deeper into next week.
• If you’re a freelancer juggling multiple clients, add the client name to the manual tag: [Client B – Quick Call]. This prevents those minutes from disappearing into a vague “Client B” bucket.
• Remote workers often have “stand‑up” variations (e.g., “stand‑up with design”). A manual label like [Stand‑up – Design] keeps the time spent on coordination separate from pure development work.
Remember, the goal isn’t to create a perfect taxonomy overnight. It’s to build a habit of catching the oddballs before they accumulate and distort your data.
So, what should you do next? Grab your next Pomodoro, spot an edge case, slap a custom label on it, and watch how that small act sharpens your weekly insight.
Step 5: Audit and Refine Your Tagging System
Now that you’ve got a taxonomy, a toolset, automation, and a handful of manual tags, the real magic happens when you actually look at the data. That moment of review is where you discover whether your system is helping or hurting your focus.
So, how do you audit a tagging system without turning it into another endless to‑do list? The answer is to treat the audit like a quick Pomodoro of its own – a focused 25‑minute sprint that ends with a concrete tweak.
Set a regular audit cadence
Pick a day and time that you already reserve for weekly planning. For most freelancers and remote workers, Friday afternoon works because the week’s data is fresh. Students might prefer Sunday evening after a study session. The key is consistency – you’ll start to notice patterns the more often you look.
Mark the audit on your calendar, give it a colour, and treat it like any other deadline. If you miss a week, don’t panic; just slide the audit to the next day.
Pull the raw data
Export the last seven days of Pomodoro sessions from Focus Keeper (or whatever app you use). A CSV with three columns – date, duration, tag – is all you need. Open it in a spreadsheet and sort by tag.
Look for three things: tags that appear only once, tags that have a huge minute count, and any blank or “[Misc]” rows. Those are the low‑ hanging fruits that tell you where the system is leaking.
Spot anomalies and edge cases
Do you see a tag like [Brainstorm – Feature X] showing up just once a month? That might be a candidate for an automated rule. Conversely, if [Break ☕] is eating 20 % of your focus minutes, maybe you need a separate “short‑break” tag so you can see the real work vs. recharge balance.
Ask yourself: “Am I still using the same prefix for manual tags?” If you notice both [Misc‑] and [Ad‑hoc] floating around, merge them into a single prefix. Consistency reduces the mental load when you scan the dashboard.
And what about tags that never get used? A tag like [Admin – Filing] might have been useful last quarter but is now dead weight. Delete it or archive it so it doesn’t clutter the dropdown.
Tweak taxonomy and automation
Take each insight and turn it into an action. For a recurring edge case, add a keyword rule in the automation settings – e.g., “brainstorm” → [Brainstorm]. For a tag that’s too broad, split it into two more precise tags, like turning [Email] into [Email – Client] and [Email – Internal].
If you notice that certain projects always get the same prefix, consider adding that prefix to the default label field so it appears automatically when you start a new Pomodoro for that project.
Keep a refinement log
After each audit, write down three items: what you removed, what you added, and what you plan to test next week. A simple markdown note in your favourite note‑taking app is enough. Over time you’ll see a clear evolution of your tagging system – and that progress feels rewarding.
Pro tip: colour‑code the log entries – green for wins, orange for “needs attention”, red for “removed”. The visual cue reinforces the habit of reviewing.
Finally, close the audit with a tiny celebration. Maybe treat yourself to a 5‑minute stretch or a favorite snack. You’ve just made your data cleaner, your insights sharper, and your future planning smoother.
What’s the next step? Grab your next Pomodoro, open the export, and spend just 25 minutes fine‑tuning your tags. You’ll be amazed at how a little audit turns chaos into clarity, and how that clarity fuels better focus every day.
Step 6: Train Your Team and Document Procedures
Get everyone on the same page
Before you ask anyone to start tagging, make sure the whole crew knows why it matters. Ask yourself: what would happen if nobody could tell a client call from a quick admin sprint?
When you can answer that question, you’ve already shown the value of learning how to tag and label sessions for review.
Gather your remote workers, freelancers, or study group for a quick 15‑minute sync. Keep it informal – coffee in hand, a shared screen, and a few real Pomodoro examples.
Create a living tagging playbook
Write down the core taxonomy you built in the earlier steps. Use a simple markdown file or a shared Google Doc so anyone can edit it later.
Each entry should have three parts: the tag itself, a one‑sentence description, and an example of a task name that would trigger it. For instance, [Study 📚] – “any focused study block”, example: “Biology flashcards”.
Leave a space for “edge‑case” tags – those that pop up once in a blue moon. That way the playbook stays flexible and doesn’t feel like a rigid rulebook.
Run a training sprint
Turn the training into its own Pomodoro sprint. Start a timer, walk through the playbook, and then let each participant label a dummy session live.
Because the timer is already running, the habit of adding a tag feels natural. If someone forgets, pause the timer, add the tag, and note the slip‑up – that’s data you can improve on.
After the sprint, do a quick debrief: What tags were confusing? Did anyone need a new keyword? Capture those insights directly in the playbook.
Document the procedures step‑by‑step
Now write a checklist that lives beside the playbook. Something like:
- Open the timer.
- Enter the task name.
- If the name matches an automation rule, the tag appears automatically.
- If not, open the label field and pick the closest tag from the playbook.
- Start the Pomodoro.
Post the checklist in a place everyone sees – the #focus‑keeper channel, a Notion page, or the sidebar of your Pomodoro app.
When the steps are visible, new team members can onboard without a lecture, and seasoned users get a reminder of the ideal flow.
Make review a team habit
Schedule a recurring 10‑minute review at the end of each week. Pull the export, filter by tag, and ask the group: which tag ate more minutes than expected? Which tag helped us hit a milestone?
Encourage everyone to add one tweak to the playbook after each review. Over time you’ll see a clear evolution – and that evolution is the proof that your tagging system actually works.
And don’t forget to celebrate the small wins. A quick high‑five, a meme in the chat, or a 5‑minute stretch keeps the momentum going.
Keep the knowledge alive
Finally, treat the playbook like a living document, not a PDF you file away. Set a quarterly reminder to scan the list for stale tags, merge duplicates, and add any new project prefixes that have emerged.
When the process feels effortless, you’ll notice that reviewing Pomodoro data stops feeling like a chore and becomes a source of insight you actually look forward to.
So, what’s the next move? Grab a teammate, open your tagging playbook, and run a 25‑minute training sprint right now. You’ll be amazed at how quickly the habit sticks and how much clearer your focus data becomes.
Conclusion
Ever felt like you’re staring at a wall of Pomodoro blocks with no clue which minute actually moved the needle? That’s the exact spot where how to tag and label sessions for review flips the script.
In the past steps we built a taxonomy, chose a tool, set up automation, and gave those oddball sessions a manual home. The real payoff shows up when you hit that weekly review and see a clean list of tags instead of a jumble of “session 1, session 2”.
So what’s the next move? Grab a teammate, open your tagging playbook, and run a quick 25‑minute sprint. Tag each block as you start, let the automation do the heavy lifting, and watch the data line up like puzzle pieces.
When the numbers start making sense, you’ll notice two things: you spend less time guessing and more time acting on insights, and you finally get the confidence to bill clients or claim study hours without a second thought.
Remember, the habit only sticks if you treat it like any other Pomodoro – schedule it, celebrate the wins, and tweak the tags when they feel off. Keep the playbook alive, and the clarity will keep coming.
You’ve got this.
FAQ
How do I start tagging my Pomodoro sessions if I’m new to it?
Begin with the three tasks you do most often – maybe “client work”, “email”, and “study”. Open the timer, type the task name, then tap the label field and pick or type a short tag like [Client]. Keep the tag under two words so you can add it in a split‑second. After a few days you’ll see a pattern and can trim the list down to the tags that really matter.
What’s the difference between a tag and a label, and do I need both?
A tag is the short keyword you attach to a Pomodoro block – think of it as a quick nickname. A label is the optional longer description you can add in the notes field, like “drafting proposal for Client X”. You don’t have to use both every time; the tag is enough for weekly reviews, while a label is handy when you need extra context for a specific session.
Can I automate tagging in Focus Keeper, or do I have to type each tag manually?
You can set up simple keyword rules so the app adds the right tag the moment you start a timer. For example, any task name that contains “research” can automatically get the [Research] tag. If you prefer total control, just hit the label field and type the tag yourself. Most users start with a hybrid approach – a few auto‑rules for the heavy‑hit tasks and manual tags for the occasional oddball.
How often should I review my tags to keep my system clean?
Treat the review like a short Pomodoro sprint – 25 minutes every Friday works for most freelancers, while students often prefer Sunday evening. Pull the last week’s export, sort by tag, and ask yourself: are any tags unused, or do some contain too many minutes? Trim the dead‑weight tags, merge duplicates, and add a new rule if you see the same edge‑case popping up twice.
What’s a good way to handle “edge‑case” sessions that don’t fit my main taxonomy?
Give them a custom tag that includes a clear prefix, like [Misc‑] or [Ad‑hoc], followed by a short note – for example, [Misc‑Brainstorm – Feature X]. During your weekly audit, filter those prefixed tags and decide whether they deserve their own rule or can stay as occasional manual entries. This keeps your main list tidy while still capturing the nuance you need.
How does proper tagging help me bill clients or track study hours more accurately?
When every Pomodoro carries a tag like [Client‑A] or [Study‑Biology], you can export a CSV and instantly sum minutes per tag. That gives you a clear invoice line for each client without hunting through notes, and students can see exactly how many focused minutes they’ve logged for each subject. The granularity removes guesswork and builds confidence in your numbers.
Are there any common pitfalls that make tagging more trouble than it’s worth?
Yes – over‑tagging is the biggest trap. If you end up with twenty‑plus tags, you’ll spend more time choosing a label than doing the work. Another pitfall is forgetting to update your taxonomy when projects change; stale tags become noise in your reports. Keep the list tight, review it weekly, and only add a new tag when you see a repeatable pattern.