Ever stared at a blank planner and felt that knot in your stomach, wondering how on earth you’re supposed to fit everything into a single day?
We’ve all been there—whether you’re a student trying to cram study sessions between classes, a remote worker juggling meetings across time zones, a freelancer juggling multiple client deadlines, or a busy professional whose inbox never seems to quiet down.
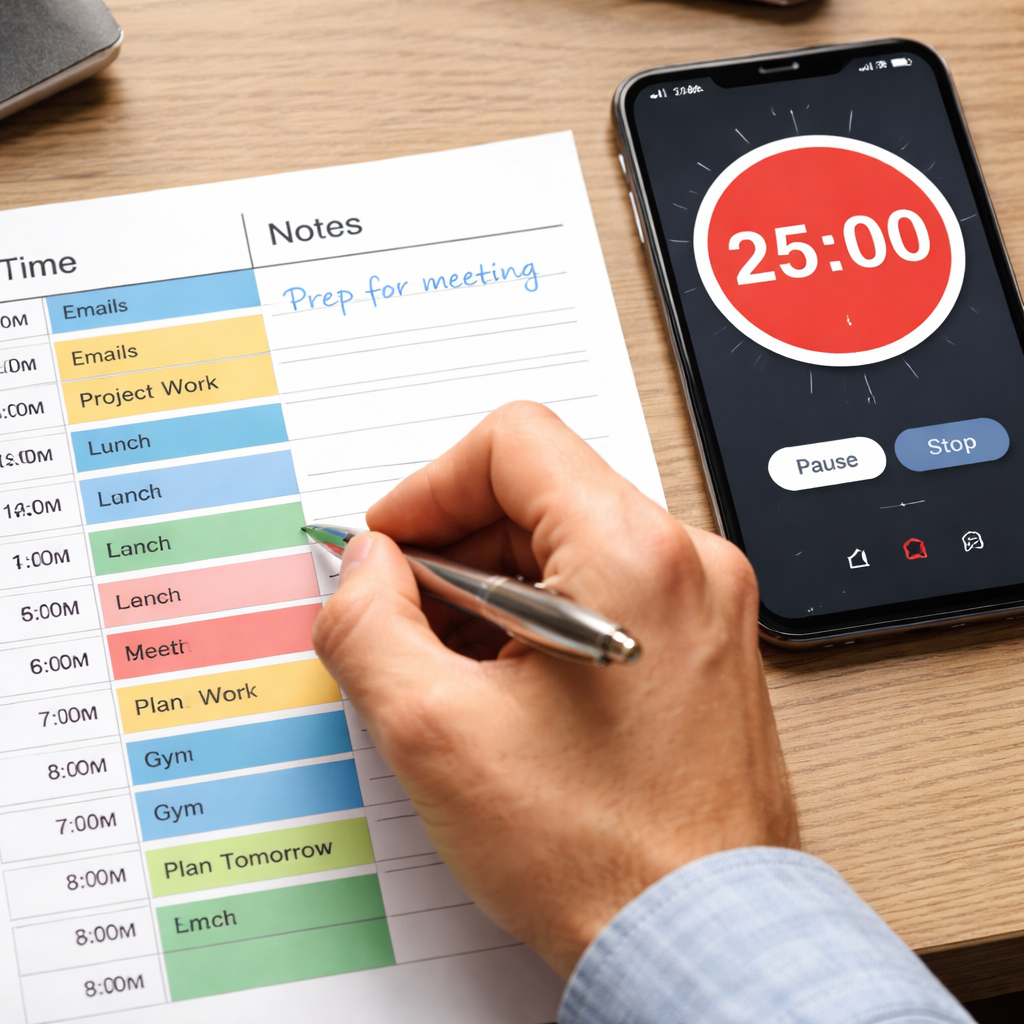
What if I told you that the secret isn’t about working harder, but about giving each task its own dedicated slice of time? That’s the essence of a time blocking template, a simple visual layout that turns chaos into a clear, manageable roadmap.
Think of it like laying out pieces of a puzzle before you start fitting them together. You allocate blocks for deep work, breaks, admin, and even those little moments of creativity that often get squeezed out. When you see your day laid out, the mental load lifts—your brain no longer has to guess what’s next.
In our experience at Focus Keeper, people who pair a time blocking template with short Pomodoro intervals report fewer distractions and a steadier flow of productivity. Imagine setting a 90‑minute block for writing a report, then slipping into a 10‑minute break, then a 30‑minute slot for email. The structure itself becomes a cue for focus.
But here’s the catch: a template is only as good as the way you use it. Too rigid, and you feel trapped; too vague, and you end up back at the same overwhelm. The sweet spot is a flexible grid that you can tweak daily—maybe colour‑code blocks for different project types, or add buffer zones for unexpected tasks.
So, why does a time blocking template matter? Because it gives you permission to say “no” to the endless to‑do list and “yes” to purposeful work. It turns abstract goals into concrete time slots, making progress visible and rewarding.
Ready to give your day some shape? Grab a printable template, or sketch one in a notebook, and start filling in those blocks tomorrow morning. You might be surprised at how much more you can accomplish when each hour has a clear purpose.
TL;DR
A time blocking template transforms chaotic to‑do lists into clear, bite‑size work windows, letting students, remote workers, freelancers, and busy pros see exactly what to focus on each hour.
Pair it with short Pomodoro bursts in Focus Keeper and you’ll cut distractions, boost momentum, and finish more tasks before the day ends.
Step 1: Define Your Goals
Before you even draw the first block, ask yourself what you really want to get out of the day. Is it finishing a research paper, delivering a client mock‑up, or simply carving out a quiet hour for deep work? Pinning down that core outcome stops the planner from becoming a wish‑list and turns it into a purpose‑driven map.
It helps to write the goal in plain language, like “write 1,000 words for the project brief” instead of the vague “work on project.” The more concrete, the easier your brain can visualise the step‑by‑step path.
Next, break the goal into bite‑size milestones. For a 1,000‑word brief, you might set: research key points (15 min), outline structure (10 min), write first draft (30 min), quick edit (15 min). Those milestones become the individual blocks you’ll slot into the template.
And remember, goals aren’t set in stone. If a meeting runs over, you can nudge a block later. The point is to have a north‑star you can adjust around, not a rigid timetable that punishes flexibility.
Here’s a quick checklist to solidify your goal before you grab the template:
- State the outcome in a single sentence.
- Identify 2‑4 sub‑tasks that lead to that outcome.
- Assign an estimated duration to each sub‑task.
- Prioritise the sub‑tasks – which one moves the needle most?
Once you’ve written that down, you’ll see the day’s “why” line up with the blocks you’ll create. It feels less like forcing yourself into a schedule and more like giving each task its own dedicated slice of time.
One tip we often share with freelancers is to tie the goal to a client deliverable deadline. When the deadline is visible, the block feels urgent, and you’re less likely to slide it into “later.” For students, linking the goal to a specific class assignment or exam date creates the same pressure.
And if you’re a remote worker juggling meetings across time zones, flag any “must‑attend” calls in your goal‑list first. Then you can protect the remaining blocks for focused work.
Think of your goal as the headline of a news article – everything else in the day should support that headline. When you look at the completed time‑blocking template, the headline should jump out at you, making the rest of the page feel like supporting paragraphs.
We like to pair this step with a quick visual reference. Our time blocking templates glossary page walks you through the anatomy of a template, so you can see exactly where each goal fits.
Now, let’s bring a real‑world example to life. Imagine you’re a busy professional who needs to prep a quarterly report, attend a team sync, and squeeze in a 20‑minute meditation break. Your goal statement could be: “Complete the Q1 financial summary and send it to the leadership team.” The sub‑tasks become data pull (20 min), analysis (30 min), draft write‑up (25 min), and final review (15 min). You slot those into the template, leaving a buffer for the sync and the meditation.
Notice how the video walks through the same process – define the outcome, break it down, then map each piece onto the grid. Watching it while you jot down your own goal can cement the habit.
After you’ve filled in the blocks, take a moment to scan the whole day. Does anything feel overloaded? If a block runs longer than its estimate, shrink the next one or add a short buffer. The goal‑first approach makes these tweaks feel like fine‑tuning, not panic‑re‑planning.
Finally, commit your goal to your mind. Say it out loud, or type it into a sticky note on your desktop. That verbal affirmation turns the abstract goal into a promise you’re more likely to keep.
With a clear, well‑defined goal, your time blocking template becomes a trusted ally rather than a chore. The rest of the steps – choosing colours, adding Pomodoro timers, reviewing at day‑end – will flow naturally from this solid foundation.

Step 2: Choose a Time Blocking Framework
Now that you’ve pinned down what you actually want to get done, it’s time to pick the “shape” of your day. A time blocking framework is just a fancy way of saying “how you slice the calendar up”. The right shape can turn a frantic to‑do list into a rhythm that feels almost effortless.
1. Fixed‑Length Blocks (the Pomodoro‑friendly way)
If you love the bite‑size focus bursts that Pomodoro fans swear by, start with 25‑ or 30‑minute blocks followed by a short reset. This works great for students cramming study sessions, freelancers tackling client drafts, or busy pros who need a clear signal to switch off.
Action steps:
- Identify your peak‑energy window (maybe 10 am‑12 pm).
- Reserve three to four 30‑minute blocks for deep work.
- Slot 5‑minute “micro‑breaks” between each block – stretch, sip water, or glance at your Focus Keeper timer.
Research from Plaud notes that dynamic interruptions ruin a rigid schedule, so keeping blocks short gives you wiggle‑room to shuffle things without losing momentum Plaud’s guide on flexible time blocking.
2. Flexible “Theme” Blocks (day‑theming for the adaptable)
When your role is constantly interrupted – think remote workers juggling meetings across time zones – a strict clock can feel like a trap. Instead, group similar activities into broader “themes”. One morning could be “client‑focused design”, the afternoon “admin & emails”, and an evening “creative side‑project”.
Try this:
- Write down the top three categories you juggle this week.
- Assign each category a colour in your time blocking template.
- Reserve a “buffer” block of 20‑30 minutes at the end of each theme for spill‑over tasks.
Todoist’s time‑blocking page recommends using a “day‑theming” approach when you have many moving parts, because it lets you protect deep‑work windows while still honoring ad‑hoc requests Todoist’s time‑blocking overview.
3. Hybrid Framework (mixing fixed and flexible)
Most of us sit somewhere between the two extremes. A hybrid model gives you the predictability of fixed blocks for high‑impact work, plus the elasticity of theme blocks for everything else.
Example for a freelance graphic designer:
- 08:00‑08:30 – “Morning reset” (quick email scan, plan).
- 08:30‑10:30 – Fixed deep‑design block (no meetings).
- 10:30‑11:00 – Flexible buffer (client calls, quick edits).
- 11:00‑12:30 – Theme: “Project A wireframes”.
- 12:30‑13:30 – Lunch break (unplug).
- 13:30‑15:00 – Fixed block: “Invoice & admin”.
- 15:00‑15:30 – Flexible buffer.
- 15:30‑17:00 – Theme: “Creative side‑project”.
The key is to treat the fixed slots as “non‑negotiable” and the theme slots as “adjustable”. When an urgent email pops up, you slide it into the nearest buffer rather than ripping up your deep‑work period.
So, how do you decide which framework fits you?
| Framework | Best For | Quick Tip |
|---|---|---|
| Fixed‑Length Blocks | Students, freelancers with clear deliverables | Pair each block with a Pomodoro timer for accountability. |
| Flexible Theme Blocks | Remote workers, managers with shifting meetings | Colour‑code themes and protect them with a “Do Not Book” calendar entry. |
| Hybrid Model | Anyone who needs both deep focus and reactive time | Use 20‑minute buffers to absorb unexpected tasks. |
Take a minute right now to glance at your calendar. Which of these three patterns feels most natural? Mark a trial day, stick to it, and note how many “lost‑time” moments you have. If you’re still unsure, start with a simple fixed‑length block for your biggest priority, then sprinkle in a theme later in the week.
Remember, the framework isn’t set in stone. As you collect data from your Focus Keeper Pomodoro sessions, you’ll see where you consistently run out of steam and can tweak the lengths or swap a theme for a fixed slot. The goal is a living, breathing schedule that serves you, not a prison you’ve built yourself.
Here’s a quick walkthrough of setting up a hybrid schedule in just a few clicks:
Ready to give it a go? Grab your time blocking template, pick a framework, and watch the chaos melt away.
Step 3: Build Your Template
Alright, you’ve picked a framework – now let’s actually put pen to paper (or mouse to screen) and build a time blocking template that feels like it was made for you.
Gather the building blocks
First, list the non‑negotiables that protect your well‑being: morning coffee, lunch, a short walk, maybe a quick meditation. Stanford’s weekly planning guide reminds us that scheduling these upfront cuts decision fatigue later Stanford’s weekly planning guide. Put them in a “must‑have” column so they never get squeezed out.
Next, pull in any fixed commitments – classes, stand‑up meetings, client calls. Write them exactly as they appear on your calendar; you’ll see the gaps that become your deep‑work windows.
Sketch the skeleton
Grab a blank grid (you can print one from Smartsheet’s free templates) or open a new sheet in Google Sheets. Label the left side with time slots – 15‑minute increments work well if you love Pomodoro bursts, 30‑minute slots if you prefer a smoother flow.
Now, create three rows for each day: Non‑negotiables, Fixed commitments, and Work blocks. This visual hierarchy shows you at a glance where flexibility lives.
Fill in the work blocks
Take the goals you locked down in Step 1. For each, ask: “What’s the concrete outcome?” and “How many minutes will it realistically need?” If you’re unsure, start with a 25‑minute Pomodoro slot and adjust after you finish.
Example for a student: Maria wants to master a chapter of organic chemistry. She writes “Review chapter 4 notes + 10 practice problems” and slots a 45‑minute block at 10 am – the time she’s most alert.
Remote‑worker scenario: Lina’s morning is packed with a 30‑minute stand‑up, so she reserves a 90‑minute “Deep‑focus writing” block right after lunch when her internet is least jittery.
Freelancer snapshot: Jamal, a graphic designer, creates a “Wireframe sprint” block of 2 hours, then follows it with a 15‑minute buffer for quick client feedback.
Busy professional example: Alex, a project manager, blocks two 60‑minute windows for “Roadmap review” and “Stakeholder update,” sandwiching a 20‑minute buffer for unexpected emails.
Layer in buffers and colour‑coding
Buffers are the safety net. Add a 10‑minute “reset” slot after every deep block – stretch, sip water, glance at your Focus Keeper timer. Over time you’ll see how often you actually need the extra five minutes, and you can fine‑tune the schedule.
Colour‑code by energy level: green for high‑impact creative work, amber for routine admin, red for low‑energy tasks. The brain reacts to colour faster than text, so you’ll instinctively gravitate to the right slot.
Review, reflect, refine
At the end of each day, give your template a quick audit. Did you finish the “wireframe sprint”? If not, note why – maybe the estimate was off, or a meeting ran long. Jot a short reflection in the “Notes” column of your template.
Weekly, step back and look for patterns. Stanford’s research shows that a weekly calendar reduces the mental load of daily decision‑making. If you notice you consistently run out of steam after 90 minutes, shrink the next deep block to 75 minutes and add a longer buffer.
Action checklist
- Write down non‑negotiables and fixed commitments.
- Choose a time‑increment grid (15‑, 30‑, or 60‑minute).
- Translate each goal into a concrete outcome with a time estimate.
- Insert work blocks, colour‑code by energy, and add 10‑minute buffers.
- At day‑end, note what worked and what didn’t.
- Every Friday, adjust next week’s template based on those notes.
Building a template isn’t a one‑off task; it’s a living habit. Treat it like a mini‑project you iterate on, and you’ll watch the chaos melt away, one block at a time.
Step 4: Apply Digital Tools
Alright, you’ve got your colour‑coded template, your buffers, and a handful of goals. Now it’s time to let technology do the heavy lifting so you don’t have to stare at a blank grid every morning.
Pick a digital home for your template
If you love the feel of a spreadsheet, Smartsheet actually offers free time‑blocking templates you can drop straight into Excel, Google Sheets, or their own platform. The daily, weekly, and monthly versions let you drag‑and‑drop tasks, add notes, and even track how much time you actually spent versus what you planned download a ready‑made template.
Prefer a dedicated app? Zapier’s roundup of the best time‑blocking tools highlights a few that sync with Google Calendar, Outlook, and even your favorite to‑do list. The key is choosing something that lets you import the blocks you just created and then automatically reminds you when it’s time to switch gears see the top time‑blocking apps.
Does that feel like a lot of options? It is, and that’s okay. The goal isn’t to collect every app on the market; it’s to pick one that matches the way you work.
Step‑by‑step: wiring your template to a tool
- Export your Smartsheet (or Google Sheets) template as a CSV.
- Import the CSV into the app you chose – most tools have an “Import tasks” button.
- Map the columns: time slot, task name, colour/energy level, and notes.
- Set a default reminder (usually 5 minutes before each block) so you get a gentle nudge without breaking focus.
- Enable “focus mode” or “do not disturb” during high‑energy blocks; many apps toggle your phone’s notifications automatically.
Once that’s done, you’ll see your day as a series of coloured bars on your screen. Click a bar, and the app can launch the Focus Keeper Pomodoro timer for you – no extra steps needed.
But what if a meeting runs over?
Build buffers that survive the unexpected
Even the best digital planner can’t stop a surprise client call. That’s why you should always slot a 10‑minute “reset” after every deep‑work block. In the app, label those buffers as “flex” and give them a low‑energy colour (maybe grey). When something spills over, just drag the overflow into the nearest flex slot. You’ll notice the habit of “moving things, not abandoning them” sticks quickly.
Remote workers, pay special attention here. If you’re juggling meetings across time zones, create a recurring “time‑zone buffer” block each afternoon. The buffer acts as a safety net for late‑day calls that otherwise would eat into your evening focus time.
Automation shortcuts you’ll wish you knew sooner
Zapier itself can automate the whole import process. Set up a “Zap” that watches a specific Google Sheet tab, and every time you add a new row it automatically creates a calendar event with the right colour and reminder. You’ll spend a few minutes building the Zap once, then let it run forever.
Another quick win: link your Focus Keeper timer to the digital tool’s notification system. When the timer hits zero, the app can automatically shift you to the next block, so you never have to manually click “next”. It feels a little like having a personal assistant who never forgets.
Quick checklist before you close the day
- Did every high‑energy block have a focus‑mode setting turned on?
- Are all flex buffers still empty, or did you need to move tasks?
- Did the Pomodoro timer start automatically at the beginning of each block?
- Take a minute to jot a one‑sentence note in the template’s “Notes” column about what worked.
That note becomes the data point you’ll use next week when you tweak block lengths or adjust colour codes. It’s the feedback loop that turns a static template into a living productivity engine.
So, what’s the next move? Grab that free Smartsheet template, import it into your favorite time‑blocking app, set up a couple of automations, and let the digital side‑kick handle the grunt work. You’ll spend less mental energy on “what’s next?” and more on actually getting things done.
Step 5: Review & Optimize
We’ve just closed the day with a solid block of work – now the real magic happens in the few minutes you spend looking back.
Do you ever finish a day feeling like you “just kind of got stuff done” without really knowing what clicked and what flopped?
That vague feeling is your cue to review. It turns a static time blocking template into a living productivity engine.
Why review matters
When you log a one‑sentence note in the “Notes” column, you create a data point you can measure later. In the Accountability Muse review of Cal Newport’s planner, the author highlights how a simple “what worked / what didn’t” log helped them spot a pattern: deep‑work blocks longer than 90 minutes started to bleed into fatigue.
That insight alone can shave 15‑20 minutes of wasted energy each week.
Data‑driven tweaks
Step 1: Pull your week’s notes into a single sheet. Look for three signals – missed deadlines, overruns, and repeated buffer usage.
Step 2: Quantify each signal. For example, if you used a 10‑minute buffer 7 times in a week, that’s 70 minutes of “unplanned” time you might reclaim.
Step 3: Adjust the next week’s template based on the numbers. If a student like Maya consistently hits a wall after a 45‑minute study block, shrink it to 35 minutes and add a 5‑minute active break.
Remote workers often see a different pattern: meetings that spill into their “deep work” slot. The fix? Insert a 15‑minute “meeting buffer” before the first deep block each day.
Freelancers love to see billable hours versus admin minutes. Color‑code any block that ends with a “buffer” that never gets used – that’s a sign you over‑estimated the task.
Busy professionals can compare the amount of time spent on “high‑energy” colour (green) versus “low‑energy” colour (red). If green drops below 30% of the day, it’s a red flag that you’re not protecting your creative time.
Quick review checklist
- Did every high‑energy block have a focus‑mode setting turned on?
- Did any buffer get filled? If so, why?
- Was the Pomodoro timer auto‑started as planned?
- What one‑sentence note captures the day’s biggest win?
- Which block felt too long or too short? Mark it for adjustment.
Take a minute now to jot those answers in your template. The habit of answering the same five questions daily builds a feedback loop that’s easier to trust than gut feeling.
Putting the insights into action
Once you have your list of tweaks, schedule a 15‑minute “optimisation sprint” at the start of next week. During that sprint, open your template, make the new block lengths, shift colour codes, and update any recurring buffers.
For a student, that might mean converting a 2‑hour “lecture review” into two 50‑minute sessions with a 10‑minute break in between.
For a remote worker, it could be moving a daily “sync” from 9 am to 8:30 am, freeing up the prime focus window from 9 am‑11 am.
Freelancers often benefit from batching client emails into a single 30‑minute “inbox block” rather than scattering them throughout the day.
Busy professionals might reserve the last 15 minutes of the day for a “shutdown” routine – a quick scan of the notes column, moving unfinished items to tomorrow’s template, and turning off notifications.
Remember, the goal isn’t perfection; it’s iteration. As you keep reviewing, the template will start to predict your energy peaks and valleys, making each day feel a little less chaotic.
So, what’s the next move? Grab your notes, run the quick checklist, and schedule that 15‑minute optimisation sprint. In a few weeks you’ll look back and see a measurable lift in completed tasks, lower stress, and more room for the things you love.
Conclusion
We’ve walked through every piece of the puzzle—from setting crystal‑clear goals to picking a framework, building the grid, wiring it into a digital tool, and finally reviewing the data.
If you ever felt that knot in your stomach staring at a blank planner, you now have a concrete, colour‑coded time blocking template that talks to your brain instead of confusing it.
The key takeaway? Small, repeatable actions win—spend five minutes each morning tweaking block lengths, add a ten‑minute buffer where you usually overrun, and log a one‑sentence note at day‑end.
Students will see study sessions stick, remote workers protect their deep‑focus windows, freelancers stop scattering client emails, and busy pros finally close the day with a clear shutdown routine.
So, what’s the next move? Grab the notes you made during the review step, set a 15‑minute optimisation sprint for tomorrow morning, and let your time blocking template evolve with each experiment.
When the blocks start feeling less like a rigid schedule and more like a trusted map, you’ll notice stress melt away and the things you love finally get space on the page.
Give it a week, compare the before‑and‑after numbers, and celebrate the small wins—you’ve just turned chaos into control with a simple time blocking template.
FAQ
What exactly is a time blocking template and how does it work?
A time blocking template is a visual grid that splits your day into dedicated chunks for specific activities. You write a clear goal for each block, assign a colour or label, and stick to the schedule as if each slot were a mini‑appointment. By turning vague to‑dos into concrete time slots, your brain stops guessing what comes next, which cuts decision fatigue and keeps focus razor‑sharp. It’s especially handy when you pair it with a Pomodoro timer, because the timer tells you when to start and stop each block.
How do I choose the right block length for my work style?
Start by noticing when you feel most alert. Students often thrive on 45‑minute study bursts, while freelancers may prefer 60‑minute creative sprints. If you’re not sure, experiment with 25‑minute Pomodoro intervals and note how often you need a break. After a week, look for patterns: are you consistently overrunning a 30‑minute slot? Then bump it up a bit. The key is to treat block length as a hypothesis you can tweak, not a fixed rule.
Can I use a time blocking template on a digital calendar instead of paper?
Absolutely. Most digital calendars let you colour‑code events, add short descriptions, and set reminders. Drag‑and‑drop blocks the same way you’d move sticky notes on a wall. The advantage is automatic alerts and easy reshuffling when something unexpected pops up. Just make sure you keep the same “Goal:” wording in the event title so you can glance at your day and instantly recall the intended outcome.
What should I do when a meeting runs over my scheduled block?
First, breathe. Then slide the overrun into the nearest buffer you’ve built into your template—usually a 10‑minute “flex” slot. If you didn’t leave a buffer, create a quick one on the fly and label it “spill‑over.” After the day ends, note why the overrun happened and adjust future estimates. Over time you’ll get better at padding tasks, and those buffers become a safety net rather than a sign of failure.
How often should I review and tweak my time blocking template?
We recommend a brief end‑of‑day check‑in and a deeper weekly review. At night, jot a one‑sentence note about the biggest win or the biggest snag for each block. On Friday, pull those notes together, count how many buffers you actually used, and look for blocks that consistently feel too long or too short. Then spend 15 minutes on Monday refining the next week’s template based on those insights.
Is a time blocking template useful for remote workers dealing with multiple time zones?
Yes, and it can be a lifesaver. Start by mapping out your core focus window—when your internet is fastest and you feel most productive. Slot deep‑work blocks there, and surround them with “buffer” blocks that can absorb surprise calls from colleagues in other zones. Colour‑code the buffers a neutral grey so they’re easy to spot. Over time you’ll see a pattern of when cross‑time‑zone interruptions happen and can proactively protect your prime hours.
Do I need a separate template for each day, or can I reuse the same one?
You can definitely reuse a master template, but treat each day as a fresh experiment. Keep the same column headings—time, goal, colour, notes—but fill in the specific tasks for that day. Reusing the structure saves setup time, while the daily goal entries keep the system flexible enough for shifting priorities. If you notice certain rows (like “Morning reset”) never change, you might lock them in as permanent fixtures and only tweak the work‑block rows.